Sunday, November 30, 2014

Southern Calico Traverse - 11/30/14

View North from Red Springs Peak

Colorful Section Near Grand Staircase Summit

Red Springs from Cairned Route to Ascent

 It was a very exciting day for six scramblers as we followed Steve and Larry across the southern Calico Hills of Red Rock Canyon NCA from the southern ridge tip almost all the way over to Angel Pass. The last section to Angel Pass would have been more exposure than a couple of the hikers cared to deal with. Steve and Larry have been working on this route for quite some time now and most of what we did today was pre-determined. There was, however, a couple of sections that Steve and Larry "winged."

Tough Crack Climb
 The hike began at the Red Springs picnic area parking lot. We started up to the right of the boardwalk fence and circled around to the back of it. A cairned trail led us on a traverse over to the end of the southern ridge of the Calico Hills.

Scrambling Up the Southern Ridge
 Our first obstacle was a crack climb of around thirty feet. The first step was a doozy but we all managed quite well in our fresh state.

Escarpment View from Southern Ridge

 From there, we began systematically climbing up the ridge taking each scramble at a time. (This mantra of "one step at a time" would be with us throughout the morning!) The views of the escarpment to the west and the North Blue Diamond Hills to the south were fantastic. Up and up we went looking for the high point which would be Red Springs Peak. Even though the scramble was a good workout, there weren't any obstacles that seemed impossible to overcome.

Red Springs Peak Summit
 We found Red Springs Peak and Jon was a happy guy! Clouds were coming in from the west that put Turtlehead Peak in the shadows (as seen in the first photo of this entry).

Red Springs Peak Eastern View Below
 We stayed on top of the ridge for as much of the traverse as possible so, next we found ourselves climbing and dropping steeply in the vicinity of the Grand Staircase summit.

Traversing by the Grand Staircase

 Since we were passing through the area, we decided to include a look at the famous "Slab Rift" on our way by. First, we ducked through a small tunnel (seen in the photo to the left) then dropped into an area below. Some of us explored both sides of the humongous slab that had disengaged from the rock to its south. This is perhaps the largest slab rift in the Red Rock area. We stopped here for a snack break before continuing.

Slab Rift Visit
 From the rift, we climbed back up over the ridge and dropped slightly on the west side. Here, there was a large crevice that could be easily climbed back up toward the ridge.

Climbing the Crevice on the West Side
 A lot of the zigzags were necessary to continue the traverse. As we rounded the next corner, we came to a particularly difficult drop. Four of the scramblers seemed to enjoy the challenge of dropping their body all the way across the crack from the top. The last two required hands on help as seen in the photo below.

Steve's Bridge Maneuver

 The "possiblity" factor had decreased. There were several places as we neared the end that hands on help was required for the writer since she is lacking in arm and knee strength that the guys seemed to take for granted. But, the help was given freely and it was much appreciated. Another small drop and climb up on the west side and we came to another tunnel. This tunnel has two "outs." Although the out to the left is easier, the out to the right is a better way to go. Coming out from the tunnel, we sat and took in our situation.

Climbing Again
 When we all got to this junction, Steve read it in our eyes. "Okay, Steve, we're done!" The choices facing us were an even more exposed and difficult traverse over to Angel Pass or descend.

Traverse Done!
 Steve, rightly, chose to descend and we all looked at each other and at the east side of the hill. Gee whiz! Really! Descend here?

Now, the Descent! (Dennis was thinking about you, Morgan!)

 Steve started and we all followed ... slowly ... carefully ... and ... did I say slowly and carefully? The first part of the descent was pretty much straight down with a few hand and foot holds and one chimney shimmy as demonstrated by Dennis above. Next came a slightly more tame down scramble. (Only Mike chose the route shown to the left!) And, finally, we hit terra firma. It was still steep but a free fall of ten feet was no longer a threat. Slowly, we all made it to the bottom of the hill and junctioned with the regular trail that circles around the base of the hills and back to the cars.

This traverse route is not for the faint of heart!

Jon Handles Everything Just Fine!
 3 miles; 1050 feet elevation gain; 4 hours

Terra Firma Descent

A Look Back at Our Descent Route


Saturday, November 29, 2014

Cowboy Horse Trails - 11/29/14

Horse Trail Across Wash below The Muffins

The Stink Eye

Climbing Up the Hill
 Today's late Saturday morning hike was a windy but pleasant hike around some of the lower elevation horse trails near the Red Rock stables. With fourteen hikers in tandem, we started from an already crowded Cowboy Trails parking lot on Highway 159 and took an immediate left onto a well-trod trail. This trail took us around behind the large corral which was full of horses and mules for the Thanksgiving weekend trail rides. As we passed the horses quite close to the fence, we got the "stink eye" from a few of them! In fact, one mule voiced his opinion!

Hiking the Ridge
 Before the horses could get too upset, we turned to our left and found ... yes, found this time ... the trail that leads up the side of the hill that lies between the horses and the highway. No wonder we did not see the trail last time we were here. It is barely decipherable! But, it is there and once we found it, we were good. The climb up the hill zigzagged and made for easy going. ... No scrambling this time!

Hiking the Ridge of Horse Trail Peak
 We hiked along the ridge from end to end with wide open views on both sides. These 360 degree views are unique to Red Rock.

View from Horse Trail Peak toward the North Blue Diamond Hills
 Looking toward the North Blue Diamond Hills, we could see the last half of today's hike as indicated in the photo above.

The Horse Trail in the Gravel Wash

After the Two Left Forks
 The footing on the descent trail is very rough and we took it very slow. Then, we rounded the corner to follow the clear horse trail in the gravel wash. There is quite a network of trails that the cowboys use on trail rides, therefore, after leaving the gravel wash, it can only be said that we took a left fork and a left fork to bring us to the small canyon beneath the Muffins hill. We soon found a large area in the canyon where there was enough seating for the group to enjoy a snack break.

Starting into the Small Canyon
 After the break, we continued up the canyon until we junctioned with the Muffins / Skull Canyon Trail. A right turn started us back toward the cars. On the way back, we took a left fork and a right fork, crossed the dirt road and followed the trail back to the trailhead. As we were packing up to leave, we saw a long line of horse riders starting up the same trail we just hiked.

3 miles; 400 feet elevation gain; 2.25 hours

Hiking the Small Canyon below The Muffins

Trail Across the Desert on Return


Friday, November 28, 2014

White Owl Canyon (long version) - 11/28/14

Terrain on Backside of Hike

Water Rushes Through the Narrows Below

Coyote at Lower Right

Hiking the Shoreline Trail
 Eleven hikers drove out East Lake Mead Parkway and passed through the Lake Mead NRA fee booth. Bearing around to the right, we drove about two miles then turned left onto the old marina road. Again staying to the right, we followed the road all the way down to where there used to be a bustling boat landing. Now, there is no water to launch any water craft at all. Only a small river way passes by a couple of hundred feet below where we parked on the old ramp.

Long Lost Anchor
 We walked down past the concrete barriers and turned right onto the Shoreline Trail which is marked by rocks lining the path. The trail is well-maintained and easy to follow as it leads along what used to be the shoreline only a couple of years ago.

Hiking the Shoreline Trail

Circling the Upper Plateau
 This area is good for fishing and we always see fishing boats out in the water. We also see water fowl such as white egrets and blue herons as we did today. On previous hikes, we even saw an osprey and several turkey vultures! Today, as we gazed out over the mud flats, we spied a coyote as it stared back at us. We are not sure if it was the same coyote but, later, we saw another coyote below the plateau at the "corner" of the route below the Hole 33 Picnic Area parking lot.

Coyote at Lower Right
 When we reached the plateau, we decided to explore the trail that circled around the higher plateau to the right. We very carefully balanced above the steep bank that dropped down to the mud flats. Fun!

Blue Heron in Lake Mead Backwaters

Circling the Upper Plateau
When we got back around to the beginning of the circle, no dirt had caved in underfoot. We learned that the trail completes the circle with a small scramble at the end. An option was provided to hike down below (in a dry Turtle Cove) toward the point at which we had climbed up to the first plateau area. Together again, we hiked around via trail to White Owl Canyon that could be seen in the distance away from the lake.

Finishing the Circle Around the Higher Plateau
 As we neared the canyon, the word was spread to be as quiet as possible so as not to scare the resident white owl away ... if he is roosting nearby.

Entering White Owl Canyon

White Owl Nest
 No such luck! The white owl was nowhere to be seen. But, the nest clearly sat in the same place as always up on the cliff to the right side of the canyon. This is a beautiful canyon and we hiked through silently. At the end of the canyon, we hiked through the first culvert. This single culvert runs underneath Lake Shore Road. The rounded corners of the canyon continued until we passed through the second culvert, a double culvert that runs underneath the River Mountains Trail.

Canyon Between Culverts One and Two
To the right after exiting the second culvert, there is a cubby in the wall that hides an old bighorn skeleton. About all that remains is the backbone vertebrae.

Old Bighorn Backbone near the Second Culvert Exit

Rita Scrambles Up
 The next section of the hike leads up the wash for 1.7 miles. There are a couple of easy scrambles to start then the wash widens and turns to heavy gravel. It is (and always will be) a long slog up the shallow slope. We had been seeing a lot of bighorn scat through the narrow portions of the canyon and it seemed quite fresh. Sure enough, one hiker finally spied the majestic creatures up on the hill to our left. There were four that we could see. The big one on the bottom left seemed to be the boss.

Finally Found the Bighorns!
 We reached the top of the wash, finally, where there is a huge wash junction of sorts. The wash we had been following continues up to the left. There is a small hill with rock seating up on the right and we stopped there for our break.

Gravel Wash Ascent

Approaching Break Area
 Below the rocks we sat upon, another wash flowed past. This would begin our final leg of the route. So, we dropped down by way of the "cement" drainage between our previous wash and the new wash. This wash was much more interesting than the first. As we hiked, the drainage narrowed and the walls became more colorful. Our direction headed straight toward Lake Mead but, at our low level, we could not see it.

Descending into Wash after Break
 About half way down to the lake, we came to Corkscrew Canyon. After today's revelation, we suggest that everyone take the treacherous up and around to the left side of the slot. In years past, the slot was navigable without ropes. Now, there is a large boulder blocking the final slide.

Wash Narrows above Corkscrew Canyon

Colorful Section
 Once you make the first formidable drop, there is no going back. So, what are you going to do when you get to the boulder as seen in a photo below? (Is there is a way up and around for this?)

Anyways. We all did the treacherous up and around for the whole slot. At the top, some of us sat and slid on the fine gravel slope but most of us descended next to the wall on the left. Either way, we were all safe at the bottom eventually.

Several Ways to Descend the Up and Around at Corkscrew Canyon
 As we continued down the narrowing canyon, we ran across a recently deceased bighorn. Hard to say what happened but it was likely either a mountain lion or he fell onto his back from the top of the wall.

Bottom of Corkscrew Canyon (BEWARE) - 10' total

Hiking Through the Wash Narrows
 At the bottom of this canyon wash, we met our final point of interest, Hippie Canyon. We ducked through the third and final culvert then proceeded to find our way through the slot maze below. We had so much fun even though, alas, the resident great-horned owls were not at home. After contorting ourselves through the obstacles, we hiked out of the canyon and connected with the Shoreline Trail near where we began earlier in the morning. This is a fun hike with a lot of variety!

7.6 miles; 1000 feet elevation gain; 4.25 hours

Large Bighorn R.I.P.

View from Third Culvert

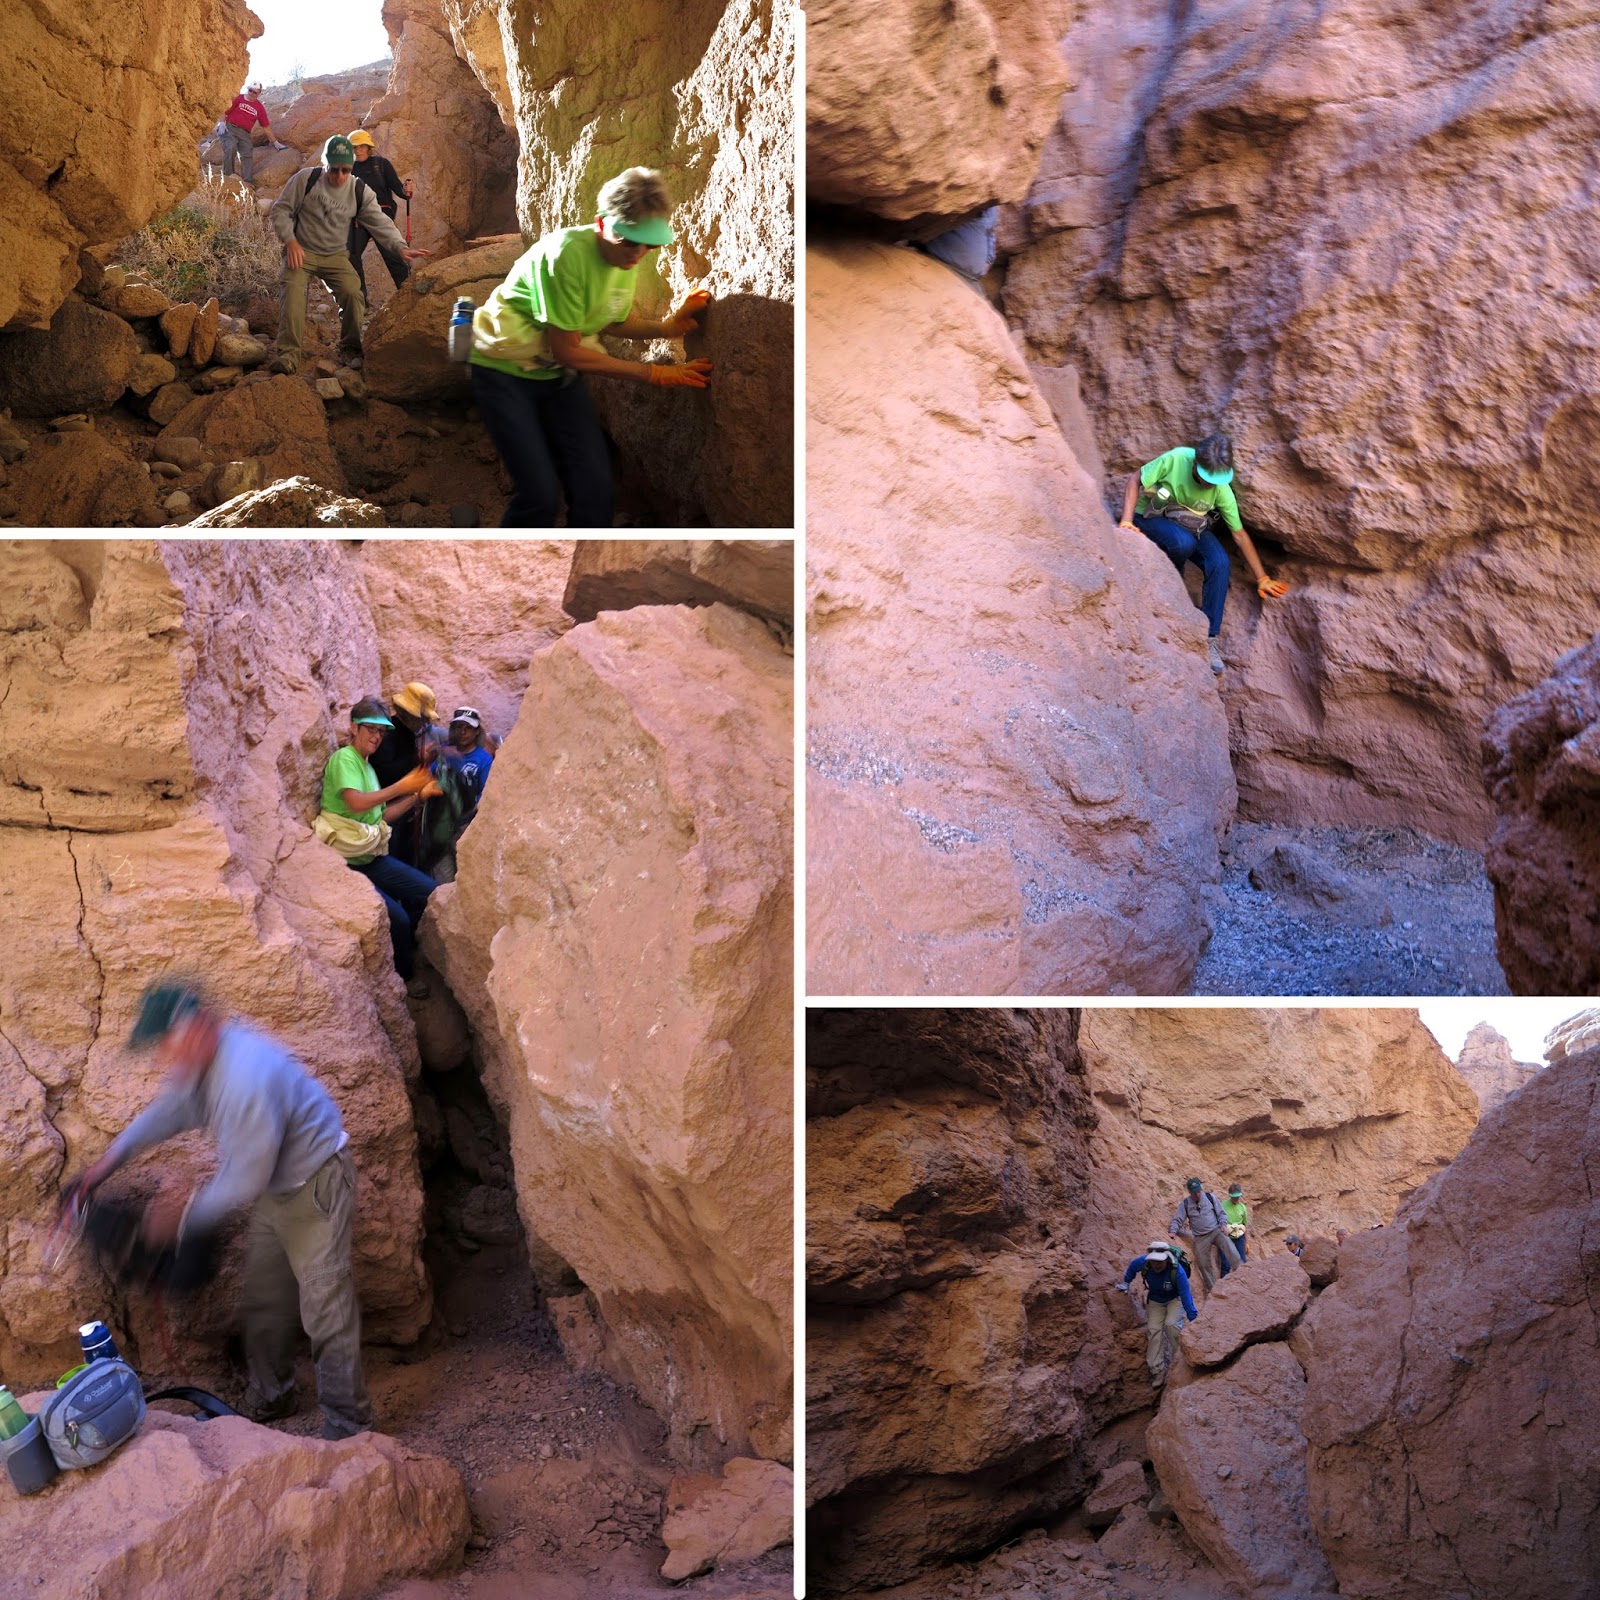
Scrambling Through Hippie Canyon